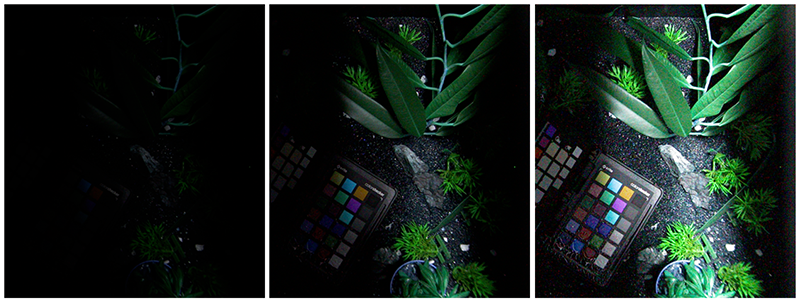
As today is the shortest day of the year (at least in the northern hemisphere) and the largest part of the day is dark, we though it a good moment to give you a few ideas on how to optimize image quality in low light conditions. Due to the simple fact that you need light to obtain an image with a visible camera, low light conditions are by definition challenging. However, even with low light you can take measures to obtain the best possible image result.
1. Increase integration time and camera gain
In low light conditions you have to do everything you can to collect as much light as possible. This is achieved by increasing the integration time. Of course your integration time is limited by the frame rate. To make a longer integration time possible it is thus advised to reduce your frame rate as much as your application allows.
If, for any reason, it is not possible to further increase the integration time, one could increase the analog (if available) and/or digital gain. Although a high gain might introduce additional noise, depending on what you want to visualize it might still help you to get a better image in a low light environment. Analog gain has a better noise performance compared to digital gain.
Some cameras, including the Adimec TMX series, offer an automatic exposure control (AEC) feature. An AEC automatically determines the best settings in terms of integration time and gain to get the best image.
Figure 1. From left to right, a gain of 1x, 8x, and 41x. The last gain factor is determined by turning on the AEC feature.
2. Turn off image processing features
In low light conditions, automatic image improvement features might not work correctly or will not give the result you want. One of these features might for example be edge enhancement or sharpness control. For color cameras switching off the color processing might work as well, i.e. set the color saturation to zero.
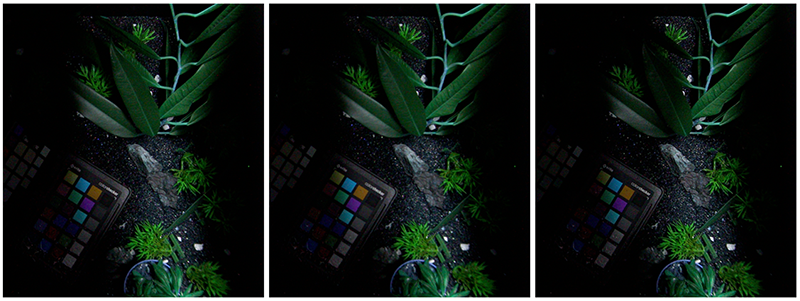
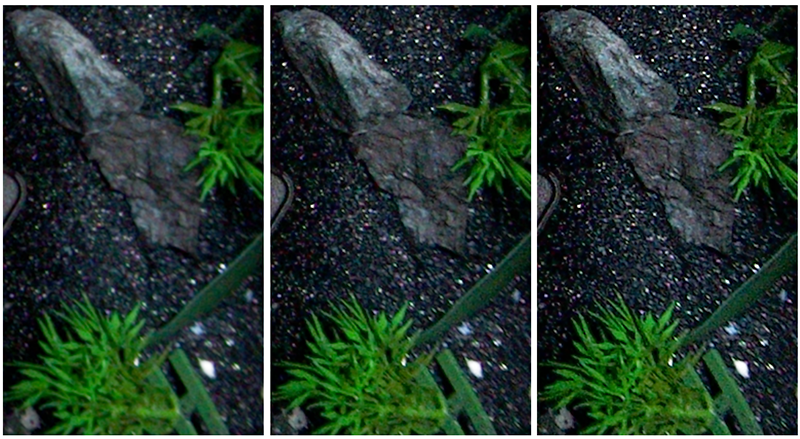
The difference in image quality for an image with sharpness control factor of 0, 1, or 2 is shown in Figure 2. With a factor of 2, the image is clearly more dark, although if you zoom in you will see that the black sand structure is more clearly visible. It thus depends on your application if you get an improvement or not.
Figure 2. From left to right, a sharpness control factor of 0, 1, and 2. The images have a gain of 8 as well.
Figure 3. Zoom in on the images in Figure 2. From left to right, a sharpness control factor of 0, 1, and 2. The images have a gain of 8 as well.
3. Consider improvements on other parts of the imaging system
Besides considering camera features to improve your image quality you may want to consider other parts of the imaging system as well. For example, in color cameras a BG38 filter is present to filter out mainly the IR light, but in the visible it has a transmittance slightly below one as well and thus some light is lost. Therefore if on system level the filter is removed in low light situations this will improve the light collection of the camera sensor. Another image system aspect that might be improved is the objective. Some objectives perform better in low light conditions compared to others. For example wide angle lenses with large apertures will give better results as they collect more light.
These were the three tips we wanted to give to you. Hopefully you can use them such that you can keep on using your camera even during these short days or in a light starved vision system!
 English
 日本語
日本語 简体中文
简体中文


